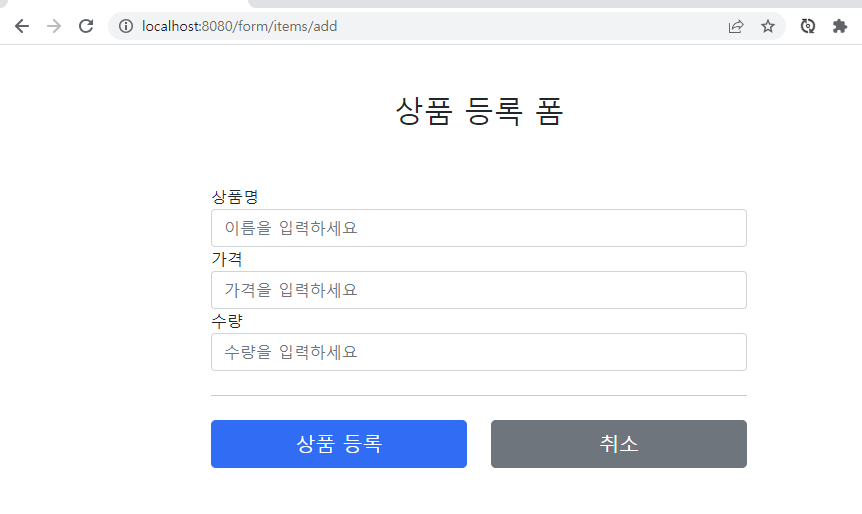
지금부터 타임리프가 제공하는 입력 폼 기능을 적용해서
기존 프로젝트의 폼 코드를 타임리프가 지원하는 기능을 사용해서 효율적으로 개선해보자.
- th:object : 커맨드 객체를 지정한다.
- *{...} : 선택 변수 식이라고 한다. th:object 에서 선택한 객체에 접근한다.
- th:field
: HTML 태그의 id , name , value 속성을 자동으로 처리해준다.
렌더링 전
<input type="text" th:field="*{itemName}" />
렌더링 후
<input type="text" id="itemName" name="itemName" th:value="*{itemName}" />
등록 폼
th:object 를 적용하려면 먼저 해당 오브젝트 정보를 넘겨주어야 한다.
등록 폼이기 때문에 데이터가 비어있는 빈 오브젝트를 만들어서 뷰에 전달하자
FormItemController 변경
@GetMapping("/add")
public String addForm(Model model) {
    model.addAttribute("item", new Item());
    return "form/addForm";
}
이제 본격적으로 타임리프 등록 폼을 변경하자.
form/addForm.html 변경 코드 부분
<form action="item.html" th:action th:object="${item}" method="post">
    <div>
        <label for="itemName">상품명</label>
        <input type="text" id="itemName" th:field="*{itemName}" class="form-control" placeholder="이름을 입력하세요">
    </div>
    <div>
        <label for="price">가격</label>
        <input type="text" id="price" th:field="*{price}" class="form-control" placeholder="가격을 입력하세요">
    </div>
    <div>
        <label for="quantity">수량</label>
        <input type="text" id="quantity" th:field="*{quantity}" class="form-control" placeholder="수량을 입력하세요">
    </div>

    <hr class="my-4">

    <div class="row">
        <div class="col">
            <button class="w-100 btn btn-primary btn-lg" type="submit">상품 등록</button>
        </div>
        <div class="col">
            <button class="w-100 btn btn-secondary btn-lg"
                    onclick="location.href='items.html'"
                    th:onclick="|location.href='@{/form/items}'|"
                    type="button">취소</button>
        </div>
    </div>

</form>
th:object="${item}" : 에서 사용할 객체를 지정한다. 선택 변수 식( *{...} )을 적용할 수 있다.
th:field="*{itemName}"
- *{itemName} 는 선택 변수 식을 사용했는데, ${item.itemName} 과 같다. 앞서 th:object 로 item 을 선택했기 때문에
선택 변수 식을 적용할 수 있다.
- th:field 는 id , name , value 속성을 모두 자동으로 만들어준다.
: id : th:field 에서 지정한 변수 이름과 같다. id="itemName"
: name : th:field 에서 지정한 변수 이름과 같다. name="itemName"
: value : th:field 에서 지정한 변수의 값을 사용한다. value=""


참고로 해당 예제에서 id 속성을 제거해도 th:field 가 자동으로 만들어준다.
렌더링 전
<input type="text" id="itemName" th:field="*{itemName}" class="form-control"
       placeholder="이름을 입력하세요">
렌더링 후
<input type="text" id="itemName" class="form-control" placeholder="이름을 입력하세요"
       name="itemName" value="">
수정 폼
FormItemController 유지
@GetMapping("/{itemId}/edit")
public String editForm(@PathVariable Long itemId, Model model) {
    Item item = itemRepository.findById(itemId);
    model.addAttribute("item", item);
    return "form/editForm";
}
form/editForm.html 변경 코드 부분
<form action="item.html" th:object="${item}" th:action method="post">
    <div>
        <label for="id">상품 ID</label>
        <input type="text" id="id" th:field="*{id}" class="form-control" value="1" th:value="${item.id}" readonly>
    </div>
    <div>
        <label for="itemName">상품명</label>
        <input type="text" id="itemName" th:field="*{itemName}" class="form-control" value="상품A" th:value="${item.itemName}">
    </div>
    <div>
        <label for="price">가격</label>
        <input type="text" id="price" th:field="*{price}" class="form-control" value="10000" th:value="${item.price}">
    </div>
    <div>
        <label for="quantity">수량</label>
        <input type="text" id="quantity" th:field="*{quantity}" class="form-control" value="10" th:value="${item.quantity}">
    </div>

    <hr class="my-4">

    <div class="row">
        <div class="col">
            <button class="w-100 btn btn-primary btn-lg" type="submit">저장</button>
        </div>
        <div class="col">
            <button class="w-100 btn btn-secondary btn-lg"
                    onclick="location.href='item.html'"
                    th:onclick="|location.href='@{/form/items/{itemId}(itemId=${item.id})}'|"
                    type="button">취소</button>
        </div>
    </div>

</form>
수정 폼은 앞서 설명한 내용과 같다. 수정 폼의 경우 id , name , value 를 모두 신경써야 했는데,
많은 부분이 th:field 덕분에 자동으로 처리되는 것을 확인할 수 있다.
렌더링 전
<input type="text" id="itemName" th:field="*{itemName}" class="form-control">렌더링 후
<input type="text" id="itemName" name="itemName" class="form-control" value="itemA">


정리
th:object , th:field 덕분에 폼을 개발할 때 약간의 편리함을 얻었다.
쉽고 단순해서 크게 어려움이 없었을 것이다.
사실 이것의 진짜 위력은 뒤에 설명할 검증(Validation)에서 나타난다.
이후 검증 부분에서 폼 처리와 관련된 부분을 더 깊이있게 알아보자.
'스프링 > 스프링 웹 개발 활용' 카테고리의 다른 글
| [Spring] 스프링 타임리프 통합 - 단일 체크박스 처리 (0) | 2023.06.23 |
|---|---|
| [Spring] 스프링 통합 폼 - 체크박스, 라디오버튼, 셀렉트박스 사용을 위한 준비 (0) | 2023.06.23 |
| [Spring] 타임리프 스프링 통합 (0) | 2023.06.22 |
| [Spring] 스프링 타임리프 통합을 위한 프로젝트 설정 (0) | 2023.06.21 |
| [Spring] 타임리프 템플릿 레이아웃 확장 (0) | 2023.06.20 |


댓글