스프링 부트 환경에서 서블릿을 등록하고 사용해본다.
서블릿은 톰캣 같은 웹 애플리케이션 서버를 직접 설치하고,그 위에 서블릿 코드를 클래스 파일로 빌드해서 올린 다음,
톰캣 서버를 실행하면 된다.
하지만 이 과정은 매우 번거롭다.
> 스프링 부트는 톰캣 서버를 내장하고 있으므로, 톰캣 서버 설치 없이 편리하게 서블릿 코드를 실행할 수 있다.
@ServletComponentScan
: 스프링 부트 서블릿을 직접 등록해서 사용할 수 있도록 @ServletComponentScan 을 지원한다.
아래는 @ServletComponentScan 을 포함한 ServletApplcation 소스이다.
ServletApplication.java
package helloMVC.servlet;

import org.springframework.boot.SpringApplication;
import org.springframework.boot.autoconfigure.SpringBootApplication;
import org.springframework.boot.web.servlet.ServletComponentScan;

@ServletComponentScan   // 서블릿 자동 등록하는 역할
@SpringBootApplication
public class ServletApplication {
	public static void main(String[] args) {
		SpringApplication.run(ServletApplication.class, args);
	}
}
여기서 @WebServlet 애노테이션이 있다. 서블릿 애노테이션인데, 서블릿의 이름과 URL을 매핑할 수 있다.
HTTP 요청을 통해 매핑된 URL이 호출되면 서블릿 컨테이너는 다음 메서드를 실행한다.
protected void service(HttpServletRequest request, HttpServletResponse response)HelloServlet.java
package helloMVC.servlet.basic;

import javax.servlet.ServletException;
import javax.servlet.ServletRequest;
import javax.servlet.ServletResponse;
import javax.servlet.annotation.WebServlet;
import javax.servlet.http.HttpServlet;
import javax.servlet.http.HttpServletRequest;
import javax.servlet.http.HttpServletResponse;
import java.io.IOException;

@WebServlet(name = "helloServlet", urlPatterns = "/hello")
public class HelloServlet extends HttpServlet {

    // Ctrl + O
    @Override
    protected void service(HttpServletRequest request, HttpServletResponse response) throws ServletException, IOException {
        System.out.println("HelloServlet.service");  // soutm
        System.out.println("request = " + request);
        System.out.println("response = " + response);

        String username = request.getParameter("username");
        System.out.println("username = " + username);

        response.setContentType("text/plain");
        response.setCharacterEncoding("utf-8");
        response.getWriter().write("hello  " + username);
    }
}
http://localhost:8080/hello?username=홍길동


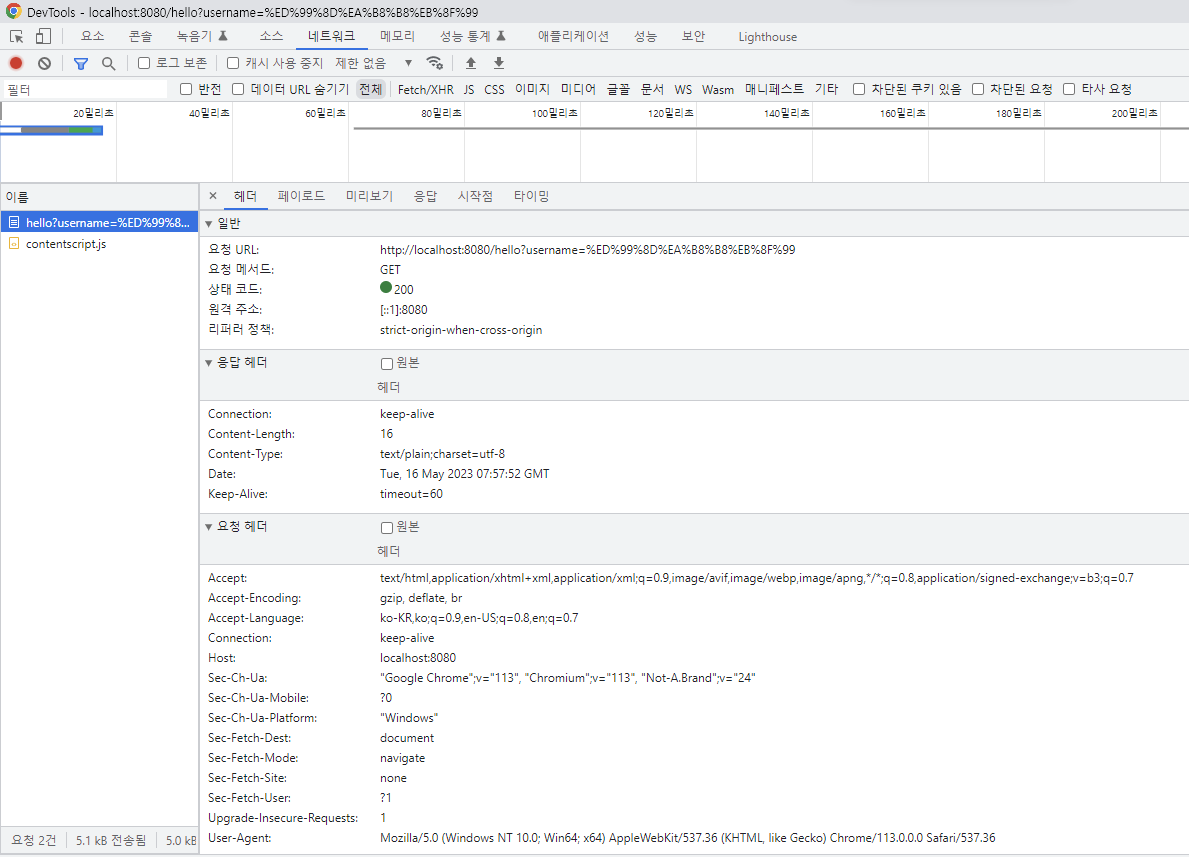
HTTP 요청 메시지를 로그로 확인해볼 수 있는 방법이 있다.

application.properties
# 이 옵션을 넣으면 제대로 데이터가 넘어갔는지 확인할 수 있다.
logging.level.org.apache.coyote.http11=debug
다만 위의 내용이 콘솔 로그에 추가될 경우, 개발에서는 유용할 수 있지만 운영에서는 모든 요청 정보가 저렇게 나오므로 효율적이지 못하다.
운영에서는 안쓰는 게 낫다.
서블릿 컨테이너 동작 방식은
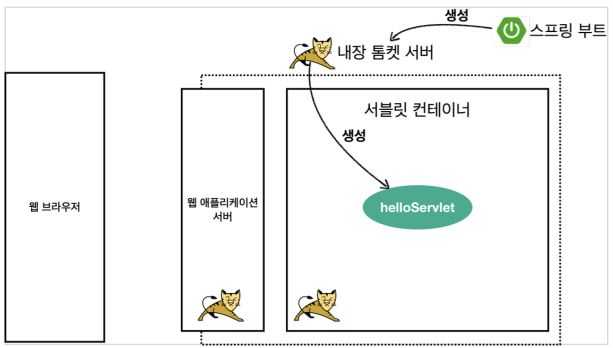
스프링 부트가 내장 톰캣 서버를 생성하고, 내장 톰캣은 서블릿 컨테이너 안에 있는 helloServlet을 생성하여 실행한다.
HTTP 요청 메시지에 따라 HTTP 응답 메시지를 생성하여 브라우저 반환한다.

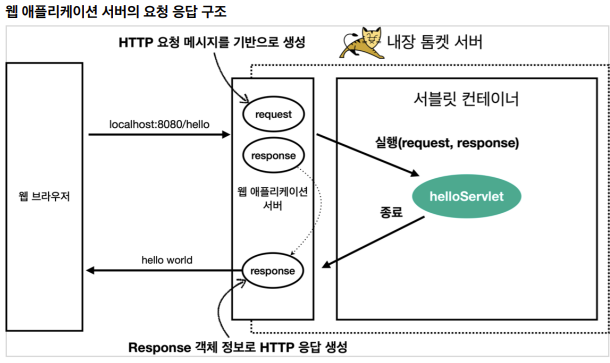
HTTP 응답에서 Content-Length는 웹 애플리케이션 서버가 자동으로 생성해준다.
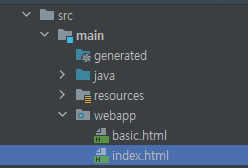
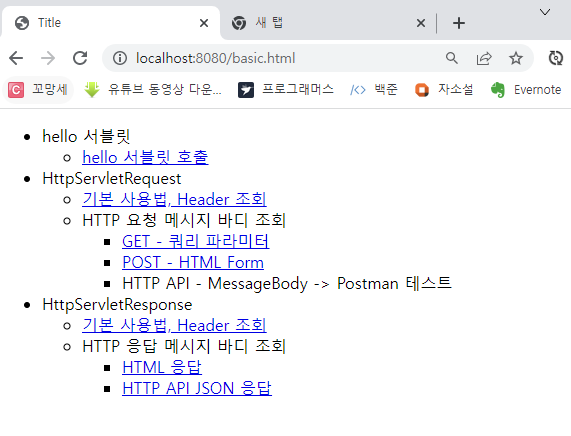
welcome 페이지 추가
<!DOCTYPE html>
<html>
<head>
    <meta charset="UTF-8">
    <title>Title</title>
</head>
<body>
<ul>
    <li><a href="basic.html">서블릿 basic</a></li>
</ul>
</body>
</html>
basic.html
<!DOCTYPE html>
<html>
<head>
  <meta charset="UTF-8">
  <title>Title</title>
</head>
<body>
<ul>
  <li>hello 서블릿
    <ul>
      <li><a href="/hello?username=servlet">hello 서블릿 호출</a></li>
    </ul>
  </li>
  <li>HttpServletRequest
    <ul>
      <li><a href="/request-header">기본 사용법, Header 조회</a></li>
      <li>HTTP 요청 메시지 바디 조회
        <ul>
          <li><a href="/request-param?username=hello&age=20">GET -
            쿼리 파라미터</a></li>
          <li><a href="/basic/hello-form.html">POST - HTML Form</a></li>
          <li>HTTP API - MessageBody -> Postman 테스트</li>
        </ul>
      </li>
    </ul>
  </li>
  <li>HttpServletResponse
    <ul>
      <li><a href="/response-header">기본 사용법, Header 조회</a></li>
      <li>HTTP 응답 메시지 바디 조회
        <ul>
          <li><a href="/response-html">HTML 응답</a></li>
          <li><a href="/response-json">HTTP API JSON 응답</a></li>
        </ul>
      </li>
    </ul>
  </li>
</ul>
</body>
</html>
'스프링 > 스프링 웹' 카테고리의 다른 글
| [Spring] HTTP 요청 데이터 종류 및 GET 쿼리 파라미터 (0) | 2023.05.17 |
|---|---|
| [Spring] HttpServletRequest 개요 및 기본 사용 (0) | 2023.05.17 |
| [Spring] 서블릿(Servlet) 프로젝트 환경 설정 (IntelliJ) (0) | 2023.05.16 |
| [Spring] 자바 백엔드 웹 기술 역사(서블릿, JSP, MVC) (1) | 2023.05.16 |
| [Spring] HTML, HTTP API, CSR, SSR (0) | 2023.05.15 |


댓글